Multiple Exposure Blending for Landscapes
Today we will be talking about multiple exposure blending. We will be blending multiple exposure to capture more dynamic range in a scene. This technique is more suited towards landscapes, such as those with sky and water/land structures in them where the scene is bright on one section (e.g up high in the sky) then gradually darker to the other (e.g bottom end of image).
Dynamic range
Dynamic range is the range of bright and dark areas in an image, that can be captured and recorded while still retaining detail in those areas. Imagine taking a photo of a man dressed in black with the sun setting behind him. You can either expose for the sky, and capture the details in the sky, but you’ll just end up with a black silhouette of the man in the suit. There would be no details in the suit, since it is physically impossible for the camera’s sensor to capture those range of bright and dark areas in a photo and still have detail. It is a compromise. Alternatively, you could exposure for the dark suit, but the sun and sky in the background will turn completely white.
All cameras have a limited amount of dynamic range, some have more than others. Digital cameras are on the low end of the scale and have dynamic range not far from that of slide or transparency film (i.e not very much).
Read more in-depth info about here.
It’s not a HDR tutorial
This is not a HDR tutorial, though technically it is HDR-ish capture since I really am capturing more dynamic range than what is normally possible with a single shot taken with a digital camera. But… it is not traditional HDR “tone mapping” (which is what HDR in the sense of the word really refers to).
The initial exposures
The most important part of this method, is the capture of the initial images. Here I have shot two images:
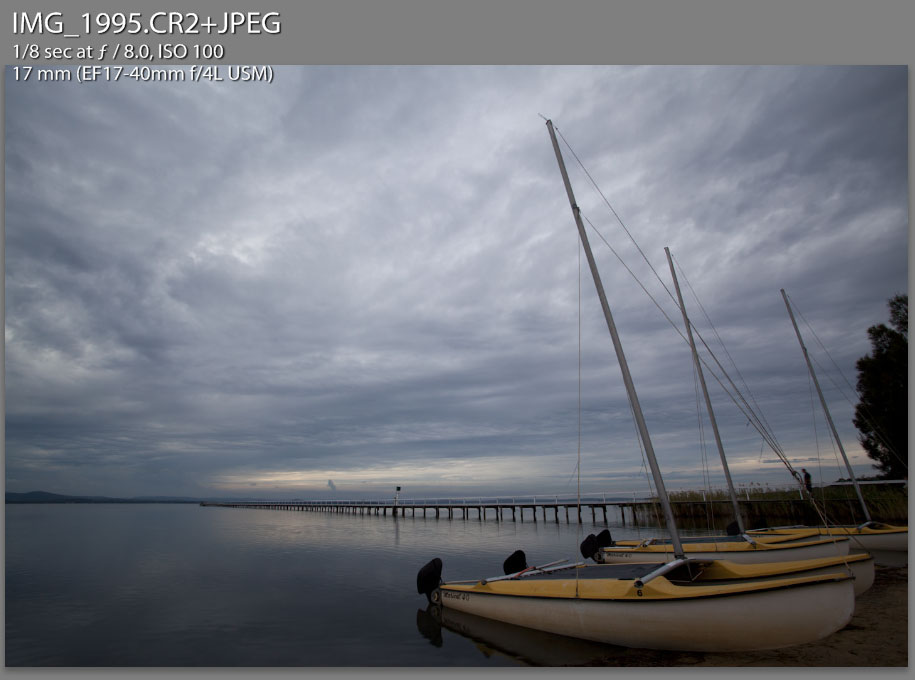
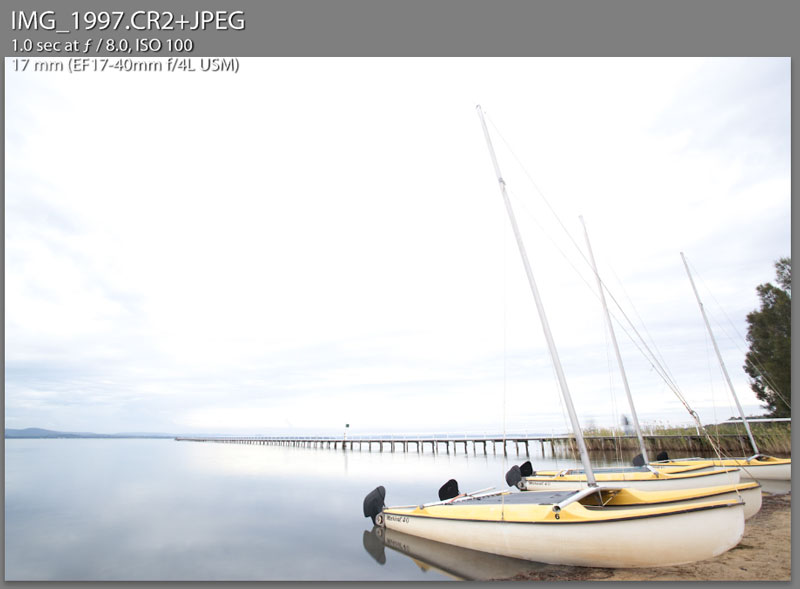
There is 3 stops in between them. It is what I felt was suitable for this scene. But different scenes may have farther apart exposures, some closer. Your mileage may vary.
I’ll assume that you know the basics of photographic exposure and how the interaction between the scene, the shutter, aperture, ISO, camera interacts etc, so I won’t elaborate too much on how I selected those exposures. But basically, one of them gives me the detail and exposure I am after in the sky, and the other for the foreground. I think it is important that one visualises how the final image will look before setting up for a shot like this.
Develop in Lightroom
Now I load the images up in Lightroom. You can use Photoshop and the Camera Raw plug-in also. But I’ll go through Lightroom as that is what I use.
For each of those images, make any adjustments that you need. Be conservative and don’t go too wild with things like saturation etc, you will be editing this in Photoshop later and more adjustments can be done there. Some of the things that I always look for are:
- exposure level, may need some tweaking
- setting the white balance
- remove any chromatic aberration, fringing etc. This sort of thing is far more easier to fix in Lightroom than Photoshop
- set sharpening to minimal radius (0.5), I mainly do final sharpening in Photoshop.
If you have Photoshop CS4 with Camera Raw 5.x
I don’t have this, but if you do you can take a shortcut and skip the next section about Photoshop CS3. You can select the two images in Lightroom, right click and go to Edit In, then Open as Layers in Photoshop…
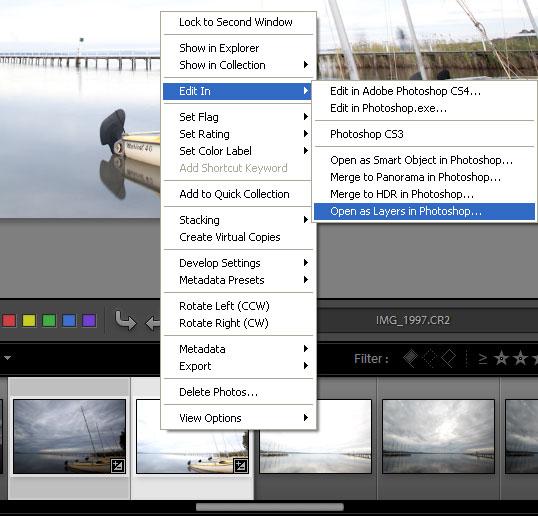
This should open a single Photoshop PSD file with each image in its own layer. I’ve never done this before since I do not have CS4, and from my understanding, it only works in CS4 (or more accurately with Camera Raw 5 which only works with CS4).
If you have Photoshop CS3
Open each image in Photoshop, right click and Edit. With the two files open in Photoshop, you need to move one image into the two second image as as a second layer. So you end up with a two layer file. I generally like to have my dark layer on top of the bright layer. But it works the other way around too, we’re trying to demonstrate the principle here and not so much any hard set rules.
Composite in Photoshop
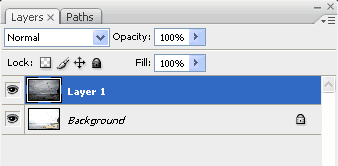
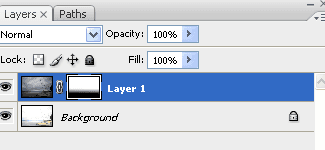
Now we have the two layers loaded in a photoshop file. We then add a layer mask to the top layer (the dark frame).
You can do this by selecting the layer and then clicking the “add layer mask” icon (image above). You’ll then see a layer mask added. By the default new layer mask it will be pure white. We then add a gradient to the layer mask, a black to white gradient to control how the two images blend into each other. You can see below the gradient I have created. You can control how gradual the blend is, and the location of the blend. All images will have its own optimum blending patterns.
With the gradient layer mask added. You should see something which looks like this:
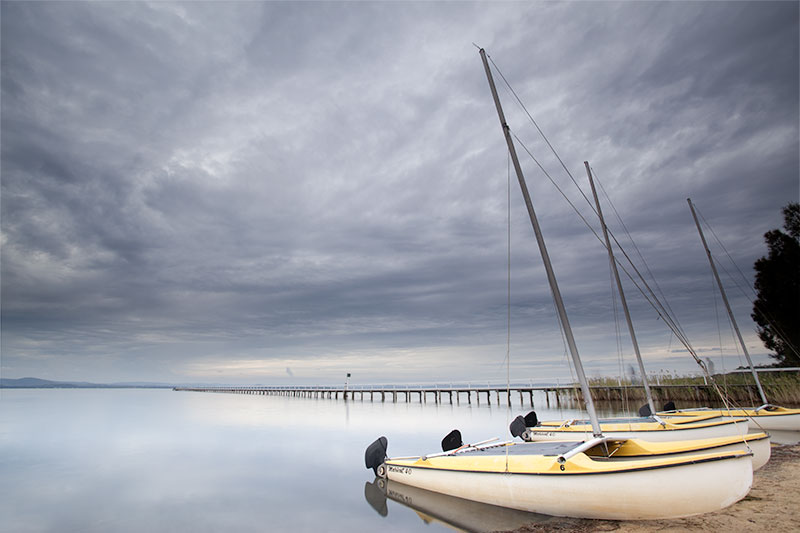
You can see now, we have combined the two exposure to something which looks a lot better. It has nicely exposed foreground and skies. Now we perform a curves adjustment, to increase the contrast.

Now this looks more like it. As you can see, it still doesn’t look like my finished image at the top. I obviously have performed more work on it, such as boosting colours, selecting “dodging and burning” etc. But I hope you can see how the exposure blending works.
If you’re interested in seeing more _behind the scene_s techniques, leave a comment below and let me know you’re interested.
Do it straight from the camera
Well, that might have sounded like a lot of work. Can we do this in the camera? Yes, no problem. This can be done using ND grad filters, which is basically a filter with a dark area on one end, and clear on the other. You can buy these in different levels of darkness (e.g ND8 grad, ND4 grad etc), and also how hard or soft the graduation is. Cokin make quite a few of these.
These filters are a good idea, but I don’t really shoot landscapes all that much (I’m more a people photographer) and I can’t warrant spending the money to invest in a nice large Cokin filter system. So I’ll keep with the exposure blending system for now.