Photoshop Smart Objects for Photographers – Part 1, Soft Proofing and LAB Color Mode
Since the release of Photoshop CS2, the introduction of Smart Objects has been a significant development. This article will discuss how photographers who shoot in RAW can leverage smart objects in Photoshop.
A highly anticipated feature is soft proofing in Lightroom. Despite Lightroom's efficient workflow tools, it lacks support for one of the most fundamental tools of modern digital editing - soft proofing. This article will explore how to virtually soft proof a RAW file undergoing adjustments for conversion.
Smart objects allow you to embed a RAW file into your layered Photoshop (.PSD) document. The embedded data contains the RAW file in its entirety, not merely a reference to the original file. This feature enables adjustments to the RAW file using Adobe Camera RAW, which means any adjustments you would typically make in Lightroom can also be made here.
The following is a method to approximate soft proofing in Lightroom. This technique allows you to preview your final output with specific printer and paper combinations, or to check for any colour gamut clipping in your images.
While soft proofing may not be the best use of smart objects, it serves as a good introduction. Subsequent articles will demonstrate how RAW smart objects can be beneficial for photographers in many other operations.
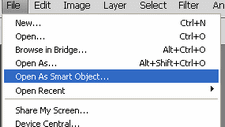
To use smart objects, navigate to File, then select Open as Smart Object…
Select the RAW file you wish to insert.
You will then encounter the Camera RAW dialog, where you can find your usual RAW conversion settings.
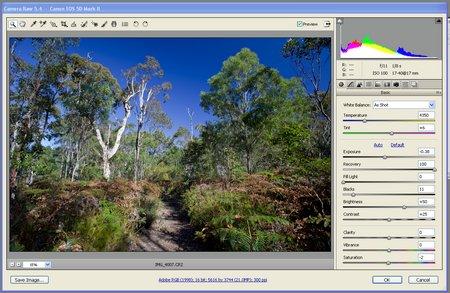
Ensure to select the appropriate colour space and bit depth. I primarily work in Adobe RGB, and 16-bit. The 16-bit selection is crucial to this example due to the subsequent steps in the tutorial.
Upon pressing OK and opening the image in the editor, you will notice a unique symbol in the lower right of the layer thumbnail in your Layers Palette, indicating the layer is a Smart Object.
Now, activate your colour proofing and gamut warning, and select the colour profile you wish to proof to.
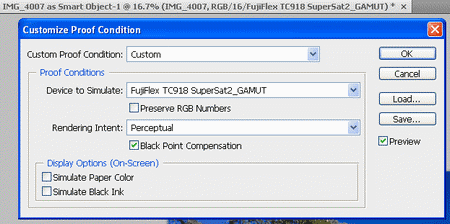
In this instance, I am proofing to a Lambda + FujiFlex Profile.
Suppose you wish to adjust the RAW file conversion settings, such as increasing the vibrancy and saturation. In that case, you can simply double click on the smart object layer, and the Camera RAW dialog will reappear.
After making your changes and hitting OK, the image on screen will update, and you can now see clipped colours! Note that adjustments in Camera RAW are not in real time; you must hit OK each time to see it update in the main window.
This tutorial merely scratches the surface of the power of using smart objects. Future tutorials will delve into more practical tasks.
Remember to save your file as a Photoshop PSD file to keep all your smart objects intact.
Consider that you can also add adjustment layers on top of smart objects, but pixel-specific editing like you would with normal raster images is not possible.
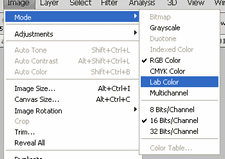
After making your adjustments, change your colour mode to LAB for some colour adjustment the way I prefer to do it.
You may encounter this dialog:
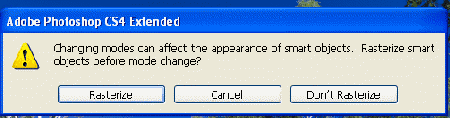
Select Don’t Rasterise. If you rasterise, you will lose your smart object.
You will now be in LAB mode, but you have not made any destructive edits to your image as the original RAW file is still intact!
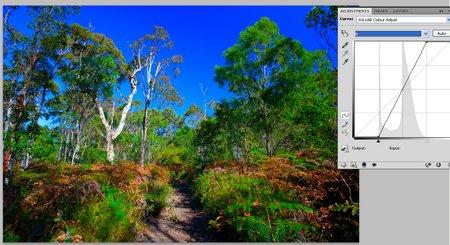
Make your LAB adjustments. Here, I have adjusted the a and b curves to make the colours “pop”, without changing luminosity. This is merely an example, and there are no clipped colours here.
If you wish to make further changes to your RAW conversion, you can do so by double clicking on the smart object again. You can make as many changes as you like (e.g., white balance, shadow recovery, etc.), without affecting the LAB curves layer you adjusted. This is a significant advantage, as without using smart objects, you would have had to revert to your original RAW file, re-convert it, and then redo the LAB adjustments.
Now if you wanted to make further changes to your RAW conversion, you can, just double click in the smart object again and can make as many changes as you like (e.g white balance, shadow recovery etc), without affecting the LAB curves layer you adjusted. This is great, since _without using smart objects, you would have had to go back to your original RAW file and re-convert it, and then do the LAB adjustments all over again.