Photoshop Smart Objects for Photographers – Part 2: Gradient and Selective White Balance
Welcome to Part 2 of the Smart Objects for Photographers tutorial. This comprehensive tutorial will guide you through the meticulous process of utilizing smart objects, focusing on selective white balancing.

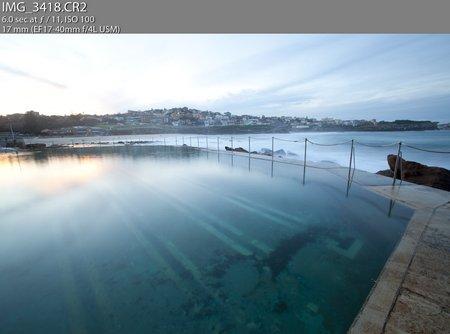
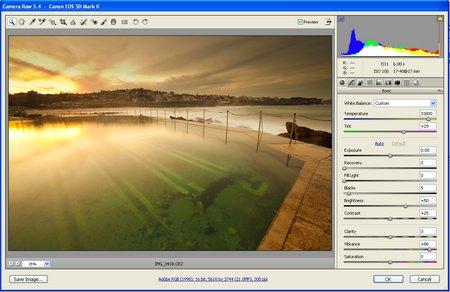
The original image, straight out of the camera, portrays Bronte Baths in Sydney, NSW, Australia.
Exploring Adobe Lightroom
Let's begin by examining our image in Adobe Lightroom. Although the skies may seem slightly overexposed, they retain enough detail in the RAW file for correction. We employ Lightroom's gradient adjustments to diminish sky exposure and regain intricate details. This level of adjustment wouldn't have been feasible if we had shot in JPEG mode.

Next, we refine the white balance to accurately reflect the evening's atmosphere. Despite the in-camera auto white balance misrepresentation, we strive for authenticity.
To achieve precise white balance, enhancing vibrancy (via the vibrancy adjustment) heightens all colors, making white balance adjustment more discerning. Once the desired white balance is achieved, vibrancy can be toned down for subtlety.
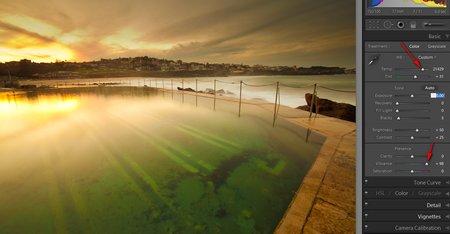
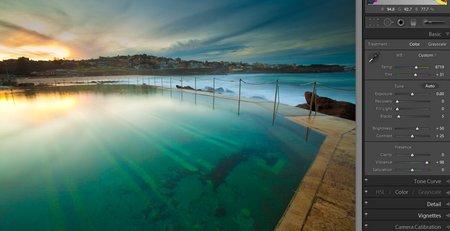
The sky now approximates its true colors, but the water remains inaccurate. Adjusting the white balance to around 8700K rectifies the water's appearance.
Leveraging Lightroom’s Gradient Tools
However, we face a challenge: how can we apply separate adjustments to the sky and foreground? Lightroom's gradient tools offer a solution.
These gradient tools allow adjustments in:
- Exposure
- Brightness
- Contrast
- Saturation
- Clarity
- Sharpness
- Color filter
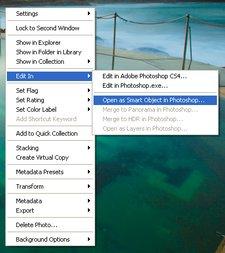
Unfortunately, white balance adjustment is not among them. Enter Smart Objects in Photoshop to address this limitation.
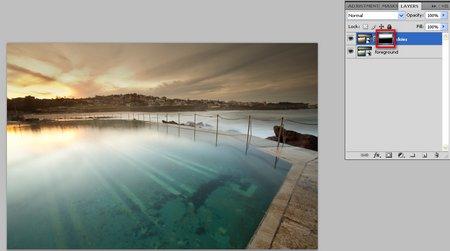
Begin by opening your image in Photoshop as a Smart Object.
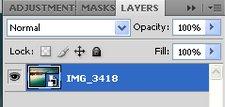
The icon at the bottom right of the layer thumbnail confirms that it's now a Smart Object. Double-clicking opens the Adobe Camera Raw dialog box, offering adjustments similar to Lightroom.
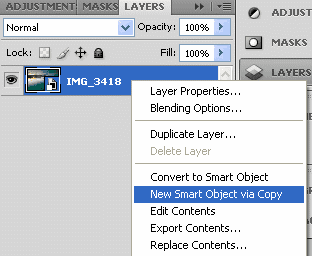
Create two Smart Objects, as we intend to apply separate white balance adjustments (and potentially other adjustments) to each copy.
Adjust white balance and any other desired settings individually for each Smart Object, distinguishing between the sky and foreground. Consider renaming the layers for clarity.
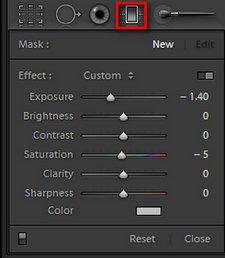
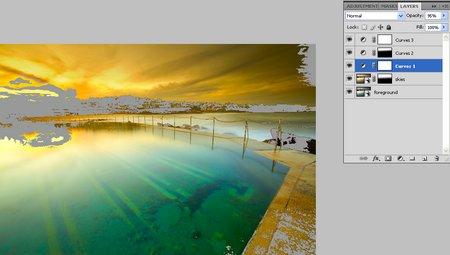
After making Camera RAW adjustments to both Smart Objects, apply a layer mask to the top layer. This ensures that sky adjustments only affect the sky section, while foreground adjustments apply solely to the foreground. Control the transition intensity using the gradient, as explained below.

Apply a black-to-white gradient mask, where the black end masks the sky layer's adjustments, revealing the foreground adjustments. Remember, black conceals, white reveals.
Furthermore, Smart Objects allow non-destructive work in LAB color mode. You can also utilize features like soft proofing and showing gamut warning, although these aren't "live" features.
Make any final adjustments, address gamut clipping, flatten the image, rasterize Smart Objects, and correct any crooked horizons.
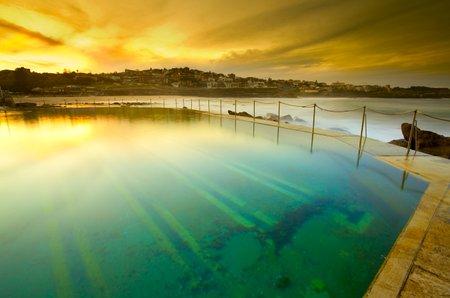
In conclusion, while this example may not be the most demanding, it showcases the advantages of using Smart Objects. In more complex landscapes, additional work, including sharpening, dodging and burning, and meticulous color adjustments, would be necessary.
When Else Is This Useful?
Graduated adjustments performed as Smart Objects can be invaluable in various scenarios, such as:
- Combining natural and artificial lighting, as long as the lighting isn't overly mixed.
- Implementing custom white balancing for different parts of an image, particularly when distinct lighting conditions are present.